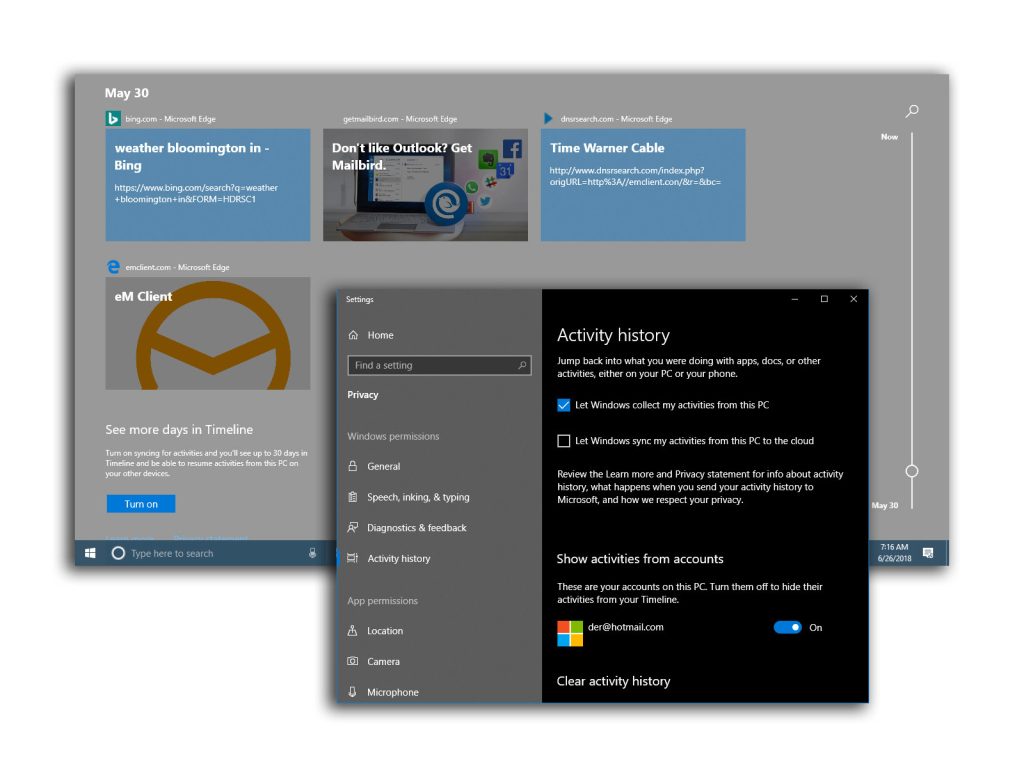
The most recent version of Microsoft’s operating system can track your actions on the computer so you can return to past tasks — if you allow it.
The Timeline feature included with the Windows 10 April 2018 Update is meant to enhance your productivity by storing a record of the files you used, sites you browsed and other actions you made on your computer. Can’t remember where you stored a document or want to return to a particular website quickly? You can click the Timeline icon in the Windows 10 task bar to see a visual log organized by date, and jump back to what you need by clicking the appropriate preview icon.

If Timeline is enabled, some of your PC activity — like files you edit in Microsoft Office — can also sync with your mobile device or another computer you use. And the tool works with the Cortana virtual assistant and its “pick up where you left off” function, which restores your work space on command.
The activity data is recorded based on the Microsoft account, so if you share both the computer and the same user account, the Timeline records are visible to all involved. To keep your travels private, create a separate account for one of you to use. If you’d generally like to keep your activity private and do not want Windows 10 tracking it, you can turn off the Timeline feature, hide it or edit it.
Press the Windows and I keys to open the Settings box (or click the gear-shaped Settings icon in the Start Menu) and select the Privacy icon. On the left side of the Privacy box, select Activity History and turn off the box next to “Let Windows collect my activities from this PC” on the right side. If your computer was set to sync your activities with other devices online, also disable “Let Windows sync my activities from this PC to the cloud.”
If you eventually get separate accounts on the computer and one of you wants to use the Timeline feature, enable the data collection option in the Activity History controls again. In the “Show activities from accounts” area of the Settings box, flip on the switch next to the account wishing to use Timeline. Within the Activity History settings box, you can also wipe your activity history. To remove activities directly from the Timeline screen, right-click the thumbnail preview and choose the Remove or Clear option.
For those who find the feature useful and wish to use it, pressing the Windows and Tab keys opens the Timeline from the keyboard. You can also open Timeline by clicking its Taskbar icon next to the Cortana search box. Don’t see the Timeline icon? Right-click the Taskbar and choose “Show Task View Button.”

